Advanced Futoshiki strategies
When the signs stop giving numbers away, hard puzzles need full pencil marks and the techniques on this page. Most of them come from Sudoku, because every row and column of a Futoshiki holds each number once, just like Sudoku's rows and columns.
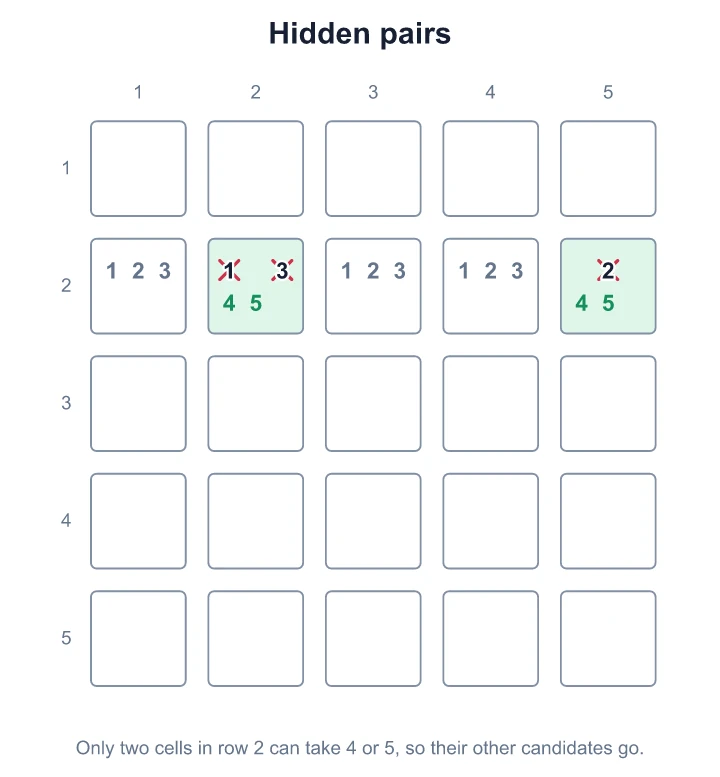
Fill in every candidate before you start. The diagrams use the same colours as the basic page: grey numbers are placed, green marks the cells the step is about, red with a cross is a candidate you remove, and purple shows a test you're following through.
Pairs
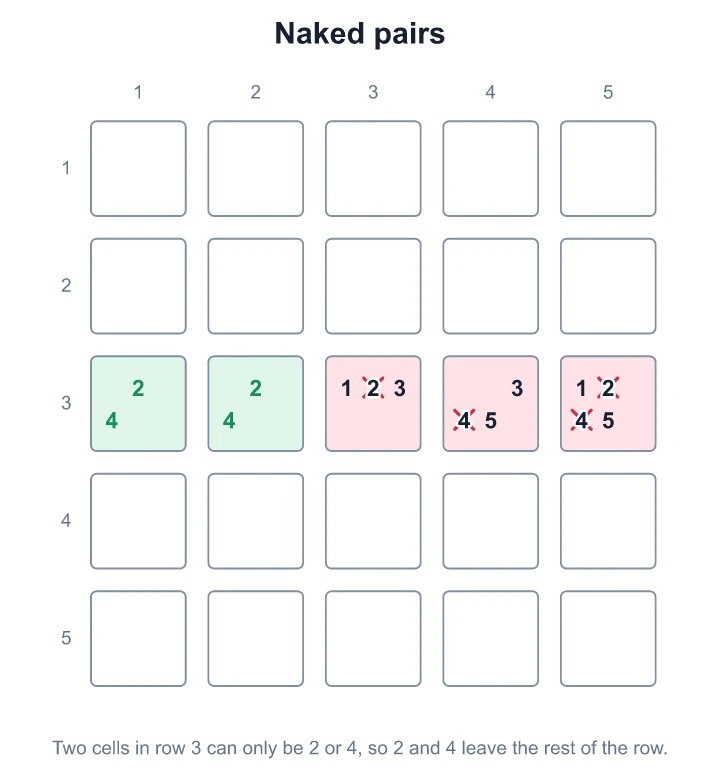
Naked pairs
Seeing it. Two cells in one row or column have the same two candidates and nothing else.
Using it. One is the first number and the other is the second. You don't need to know which way round: no other cell in that line can have either number. In the diagram, two cells in row 3 can only be 2 or 4, so 2 and 4 come off the other three cells. The same idea works with three cells that share three candidates between them.
Pairs
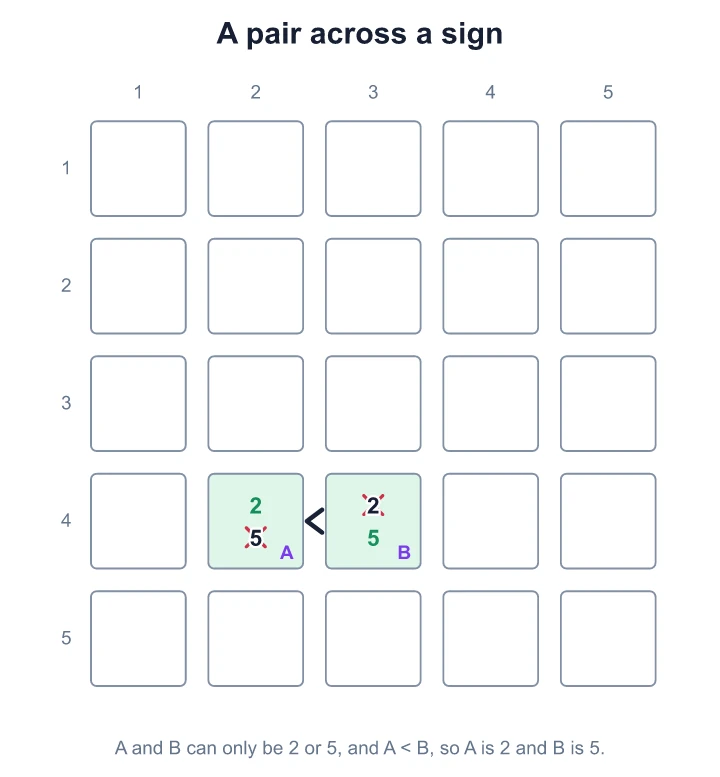
A pair across a sign
Seeing it. Two cells joined by a sign have the same two candidates. A naked pair on its own doesn't say which cell takes which number, but the sign does.
Using it. The smaller number goes on the pointed side and the bigger number on the open side. In the diagram A and B can only be 2 or 5, and A < B, so A is 2 and B is 5. Watch for this whenever a naked pair sits side by side with a sign between the cells.
Row and column logic
Sudoku techniques still work
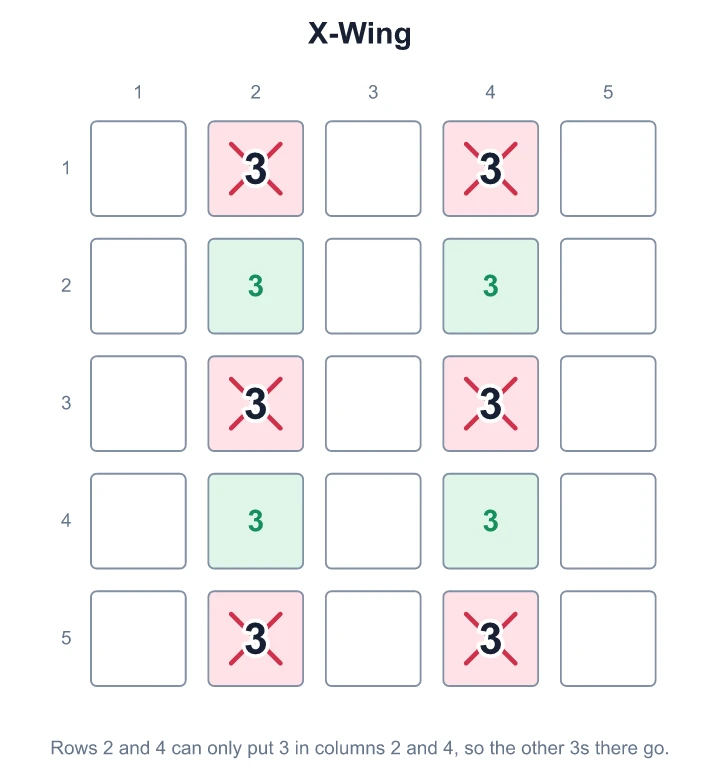
Seeing it. Any technique from Sudoku that only uses rows and columns works in Futoshiki: hidden singles, triples, X-Wings and chains. The diagram shows an X-Wing. In rows 2 and 4, the only places for 3 are columns 2 and 4.
Using it. Each of those rows needs a 3, and between them they take one 3 in column 2 and one in column 4. So no other cell in those columns can be 3. Ignore anything about 3×3 boxes, since Futoshiki has none. Our basic, intermediate and advanced Sudoku strategies explain the rest with diagrams.
When you're stuck
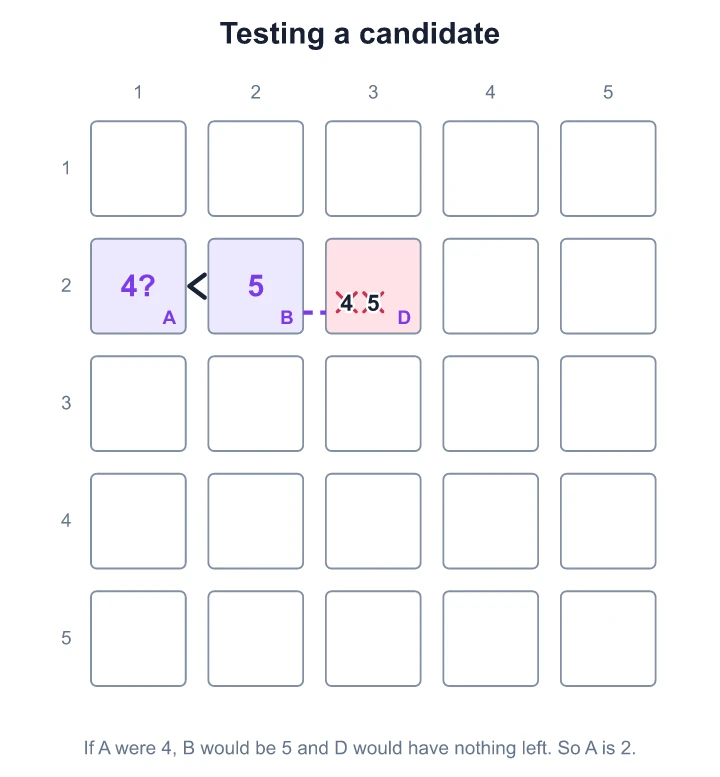
Testing a candidate
Seeing it. Find a cell with only two candidates, ideally one joined to others by signs, so a guess spreads quickly.
Using it. Suppose one candidate is right and follow what it forces. If that leads to a cell with no candidates, or the same number twice in a line, the candidate is wrong. In the diagram A is 2 or 4, B is 3 or 5, and D, in the same row, is 4 or 5. If A were 4, B would have to be bigger, so 5. Then D would have nothing left. So A is 2. Keep this as a last resort, and test one candidate at a time: a well-made Futoshiki never needs a real guess.