
How to solve Asterisk Sudoku
Asterisk Sudoku is ordinary Sudoku with one extra unit: nine cells arranged in an asterisk around the centre of the grid. Each box holds one of them, and they line up along rows 3, 5 and 7 and columns 3, 5 and 7, so a single digit can rule out several of them at once.
Start here
The rules
Fill the grid so that every row, every column and every 3×3 box holds the digits 1 to 9 once each.
In Asterisk Sudoku, the nine shaded cells of the asterisk also hold 1 to 9 once. They're the centre of the grid, the cells three squares from it up, down, left and right, and the four cells two squares from it diagonally. Each box has exactly one.
Asterisk Sudoku strategies
These seven techniques put the asterisk to work. Everything in How to solve Sudoku still applies, with the asterisk counted as one more unit. Take care with unique rectangles: a rectangle is only a deadly pattern if the asterisk holds none of its corners, or two side by side in the same row or column.
A few terms first. The asterisk is nine cells: the centre of the grid, the cell three squares from it in each direction along its row and column, and the four cells two squares from it diagonally. In grid terms that's row 2, column 5; row 3, columns 3 and 7; row 5, columns 2, 5 and 8; row 7, columns 3 and 7; and row 8, column 5. Each box has exactly one, so a digit in the asterisk cell of one box can't be in the asterisk cell of any other. Rows 3 and 7 and columns 3 and 7 hold two asterisk cells each, and row 5 and column 5 hold three. In the diagrams the asterisk cells are shaded grey with a small star.
The diagrams use the same colours as our other guides. Green marks the cell the step is about and the answer it gives you. Blue marks the cells it depends on. Purple marks the cells you're scanning. Red with a cross is a candidate you can remove.
Remember to check the asterisk as you would any other unit.
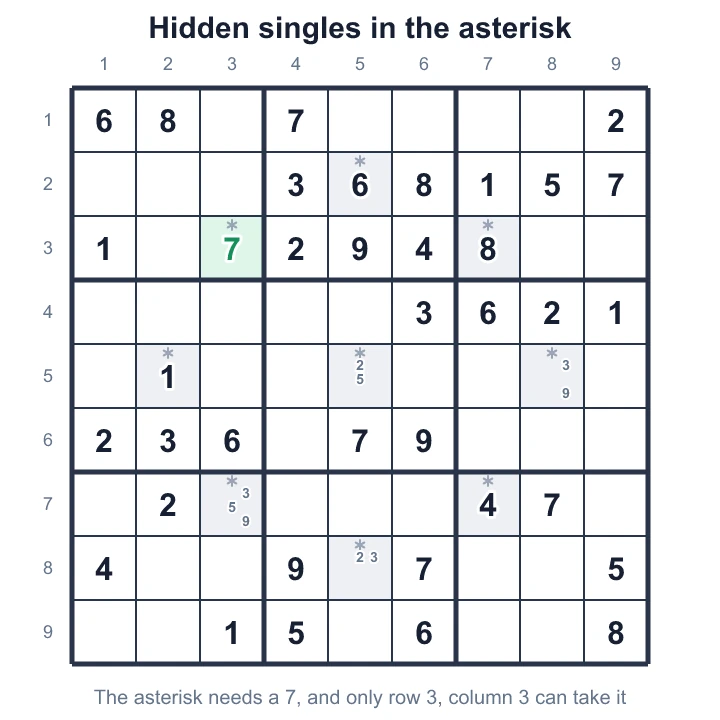
Singles in the asterisk
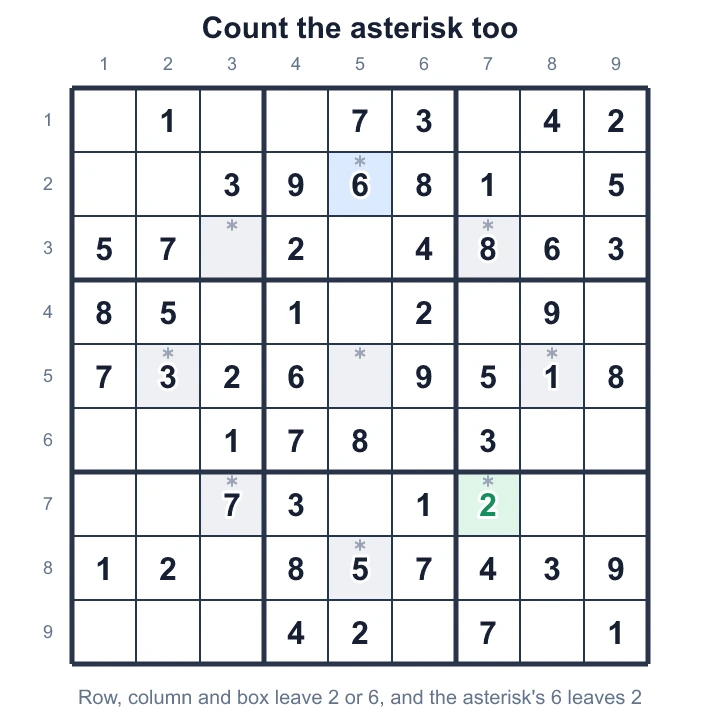
Count the asterisk too
Seeing it. No two asterisk cells share a box, and many share no row or column either, so each one has neighbours that the ordinary rules don't give it. An asterisk cell is often down to one candidate sooner than you'd expect. In the diagram, the green cell is row 7, column 7. Its row, column and box hold every digit except 2 and 6.
Using it. Now look at the other asterisk cells. Row 2, column 5 is already 6, so the green cell can't be 6 and must be 2. When you list the candidates for an asterisk cell, always check the digits in the other eight.
The asterisk, rows and columns
The asterisk along a row or column
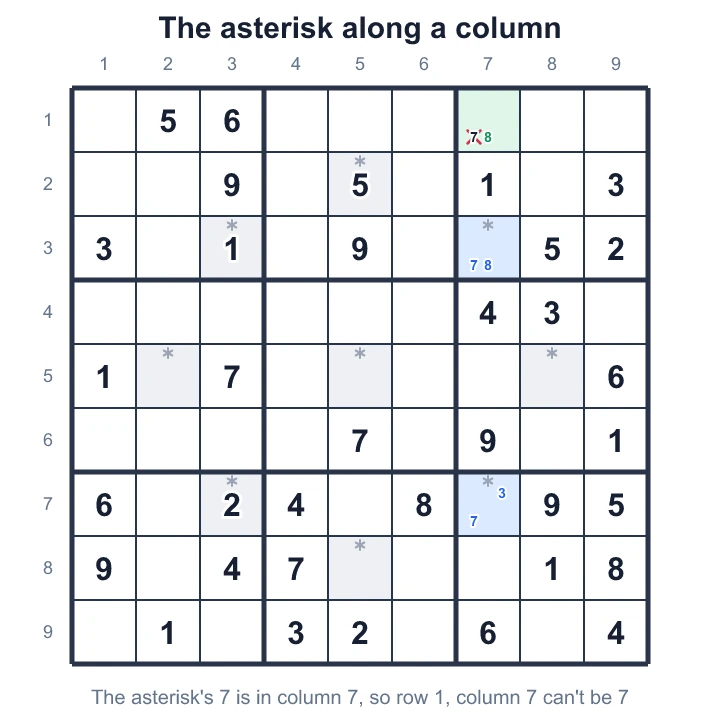
Seeing it. This works like a pointing pair. Look for a digit whose only places in the asterisk are on one row or one column. In the diagram, the asterisk can only take 7 in column 7: row 3 or row 7.
Using it. The asterisk's 7 is in column 7, so column 7's 7 is one of those two cells. Remove 7 from the rest of the column. Here that's the green cell, row 1, column 7, which is left with 8. Rows 3 and 7 and columns 3 and 7 are the ones to watch, because they hold exactly two asterisk cells.
The asterisk, rows and columns
A row or column that points into the asterisk
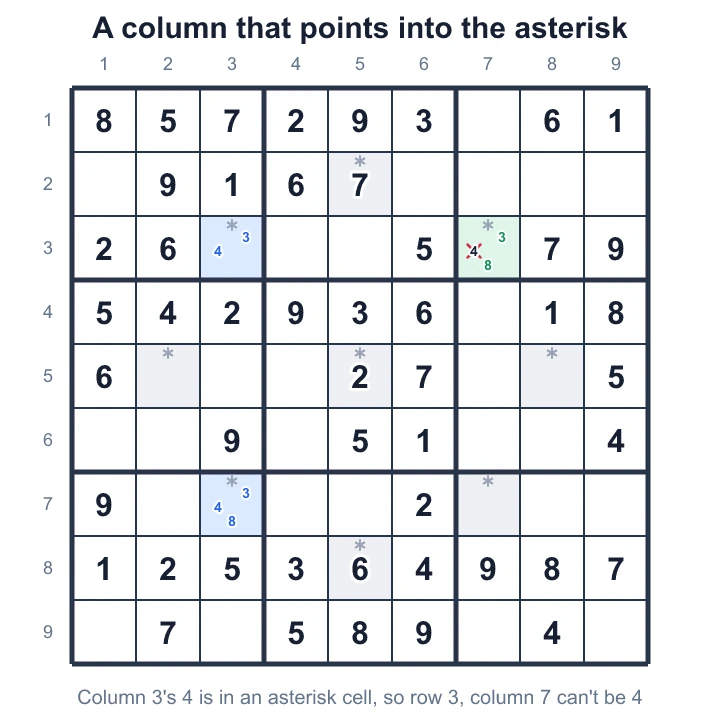
Seeing it. Now turn it round. Look for a row or column whose only places for a digit are asterisk cells. In the diagram, column 3 can only take 4 in row 3 or row 7, and both are asterisk cells.
Using it. Column 3's 4 is in an asterisk cell, so the asterisk's 4 is in column 3, and no asterisk cell outside column 3 can be 4. The green cell, row 3, column 7, loses its 4 and is left with 3 or 8.
Pairs in the asterisk
Pairs in the asterisk
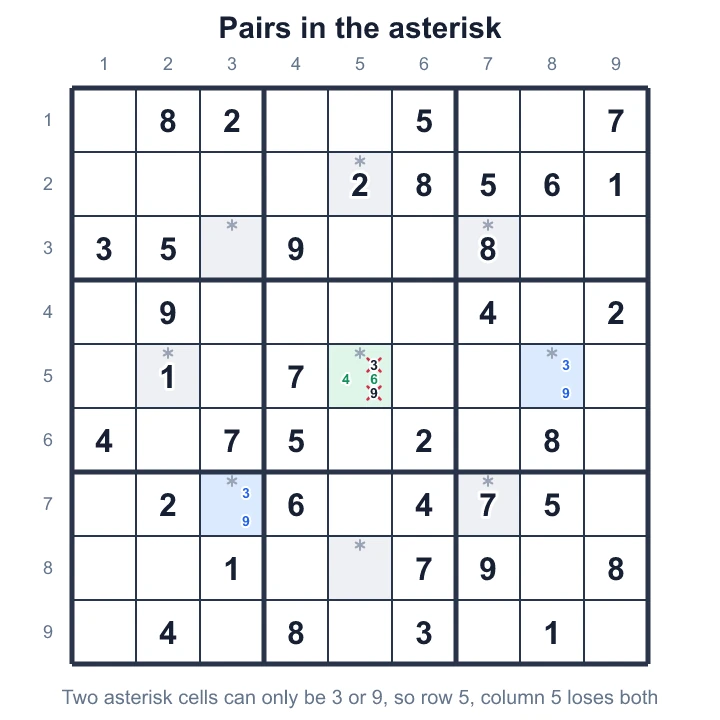
Seeing it. Naked pairs and triples work across the asterisk exactly as they do in a box. In the diagram, row 5, column 8 and row 7, column 3 can only be 3 or 9. They share no row, column or box, so only the asterisk links them.
Using it. Those two cells take the asterisk's 3 and 9 between them, so no other asterisk cell can be 3 or 9. The green cell, row 5, column 5, loses both and is left with 4 or 6.
Cells that see two places
Two places seen from the asterisk
Seeing it. Look for a digit with exactly two places in a row, column or box, then for a cell that sees both of them. The asterisk lets a cell see a place it would never reach through its row, column or box. In the diagram, column 3 can only take 1 in row 2 or row 7, and row 7, column 3 is an asterisk cell.
Using it. One of those two cells is 1. The green cell, row 2, column 5, is in row 2 with the first and in the asterisk with the second, so whichever holds the 1, the green cell sees it. It can't be 1 and is left with 6.
