How to solve Hashiwokakero
Hashiwokakero, Japanese for "build bridges!", comes from Nikoli, the Japanese puzzle publisher, and first appeared in its magazine in 1990. In English it's often called Hashi or Bridges.
Start here
The rules
Each circled number is an island. Connect the islands with bridges so that every island has as many bridges as its number.
Bridges run straight across or up and down, never diagonally, and never cross another bridge or pass through an island. Two islands can be joined by one bridge or two, but no more.
When you've finished, every island must be connected to every other one through the bridges, in a single network.
Hashiwokakero strategies
These eight techniques solve Hashi from the first bridge to the last. The first five count bridges. The last three keep every island joined into one network, which is the rule most solvers forget until they're stuck.
A few terms first. An island is a circled number, and its number is how many bridges it needs. A neighbour is the nearest island in a straight line across or down, with no bridge in the way. Two islands can be joined by one bridge or two, never more.
The diagrams use a small 7×7 grid so each step is easy to see. The same reasoning works on the grids in our books, which run up to a giant 30×30. Green marks the island the step is about and the bridges it gives you, blue marks the neighbours it depends on, grey islands are already complete, purple shows a test you're following through, and red with a cross is a bridge you can't draw.
Cross off each island as soon as it has all its bridges. A complete island can't take any more, which often leaves its neighbours with only one place to go.
Starting points
Islands with one neighbour
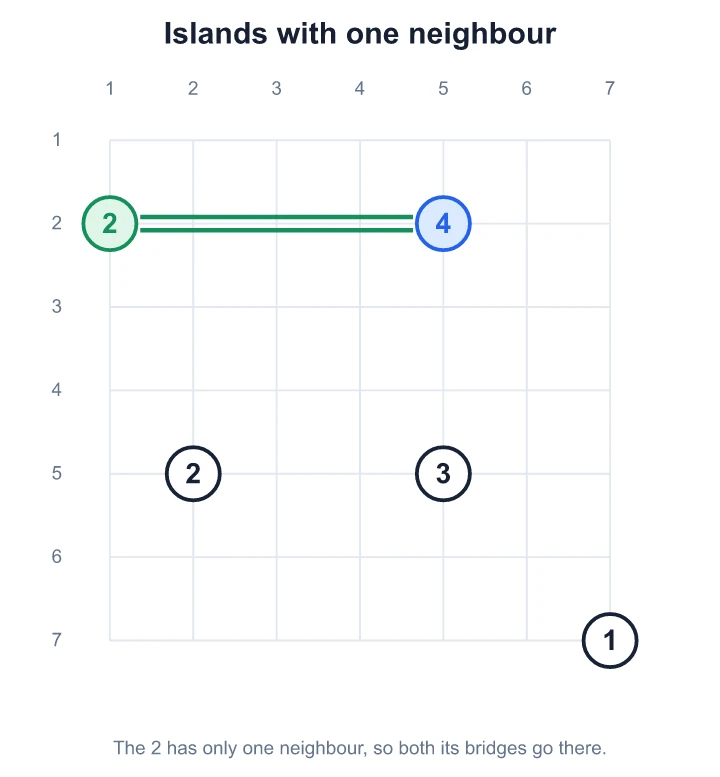
Seeing it. Look along each island's row and column. If only one other island can be reached, every bridge it needs has to go there.
Using it. Draw them in. In the diagram the 2 in row 2 has nothing above it, below it or to its left, so both its bridges go to the 4. An island with one neighbour can only be a 1 or a 2, because two bridges is the most one pair of islands can share.
Starting points
Full islands
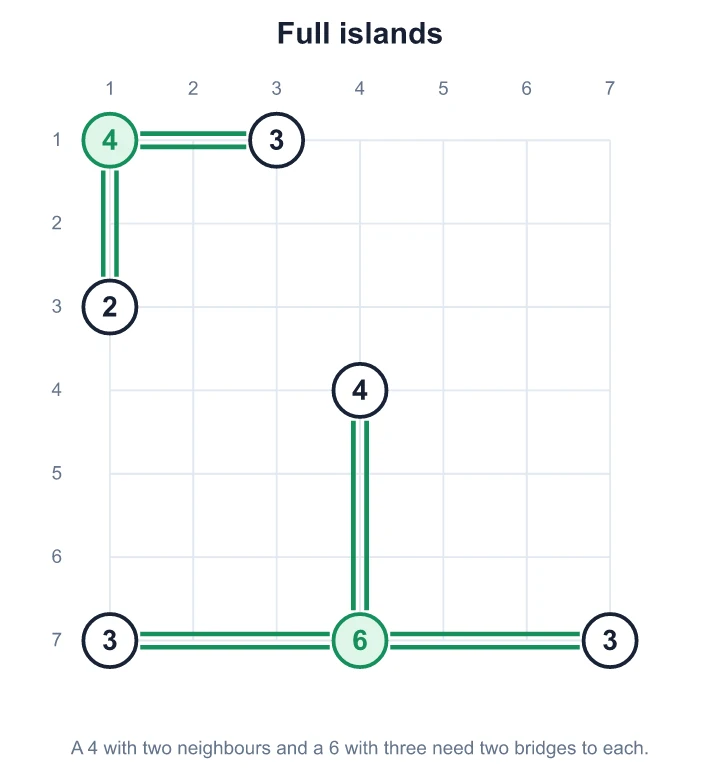
Seeing it. Count an island's neighbours and double it: that's the most bridges it could ever have. If its number is exactly that, it needs two bridges to every neighbour.
Using it. Draw every double bridge straight away. In the diagram the 4 in the corner has two neighbours, and the 6 on the bottom edge has three. The same is true of an 8 with four neighbours, and of a 2 or 4 that is down to one or two neighbours because the others are complete or blocked.
Starting points
One bridge to every neighbour
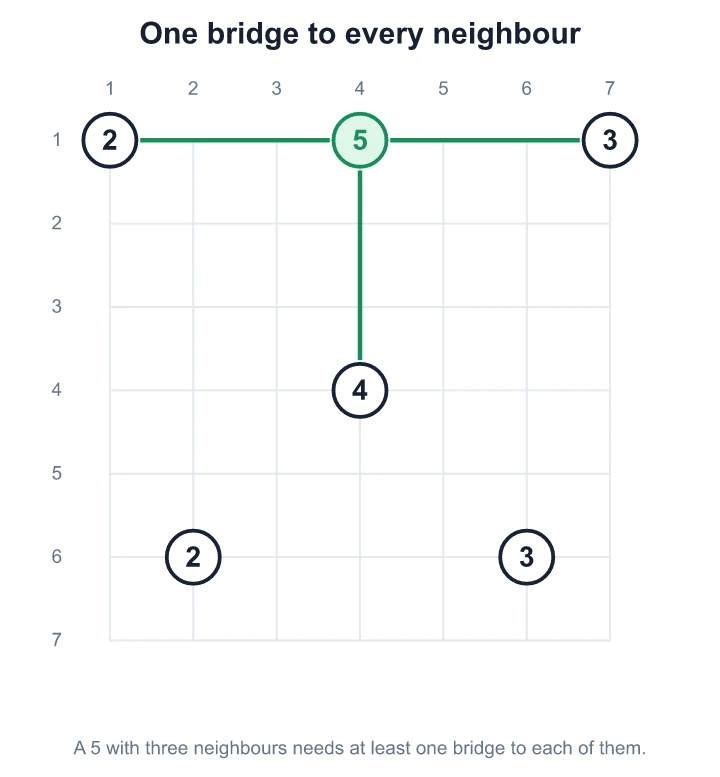
Seeing it. An island's number is one less than double its neighbours: a 3 with two neighbours, a 5 with three, or a 7 with four.
Using it. Draw one bridge to every neighbour. Leaving any neighbour out would leave too few: in the diagram the 5 has three neighbours, and any two of them can give it at most 2 + 2 = 4. You don't know yet which neighbour gets the second bridge, but the single ones are certain.
Neighbours and crossings
Neighbours that can only take one
Seeing it. A neighbour can't give an island more bridges than it has room for. A 1 can take one bridge at most, and so can any island that has one bridge left to place.
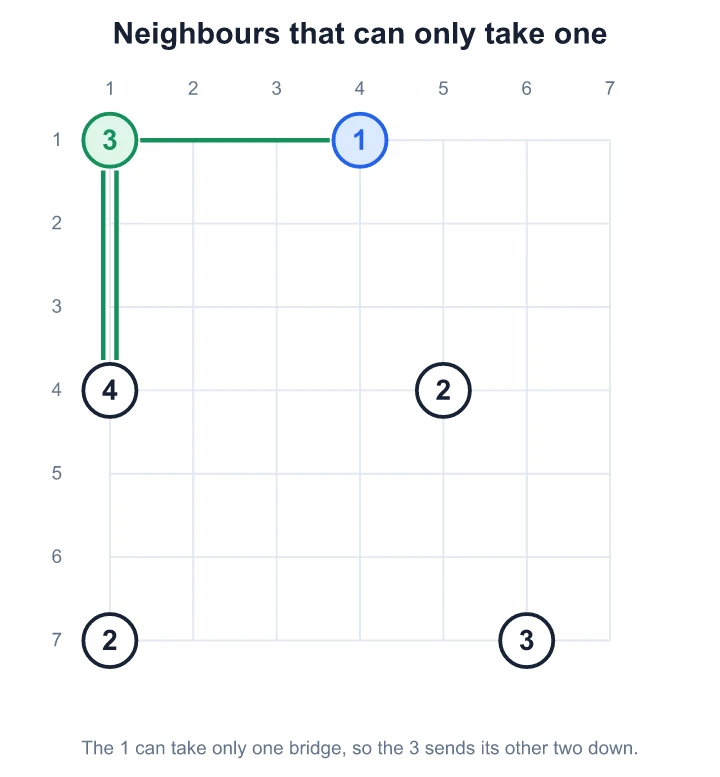
Using it. Count what each neighbour can still take, then give the rest to the others. In the diagram the corner 3 has two neighbours: a 1 and a 4. The 1 can take one bridge, so the 3 needs two from the 4 and one from the 1. The same counting cracks a 4 or 6 whose neighbours include a 1.
Neighbours and crossings
Bridges that block the way
Seeing it. Bridges can't cross each other. Every bridge you draw cuts off the islands on either side of it from each other.
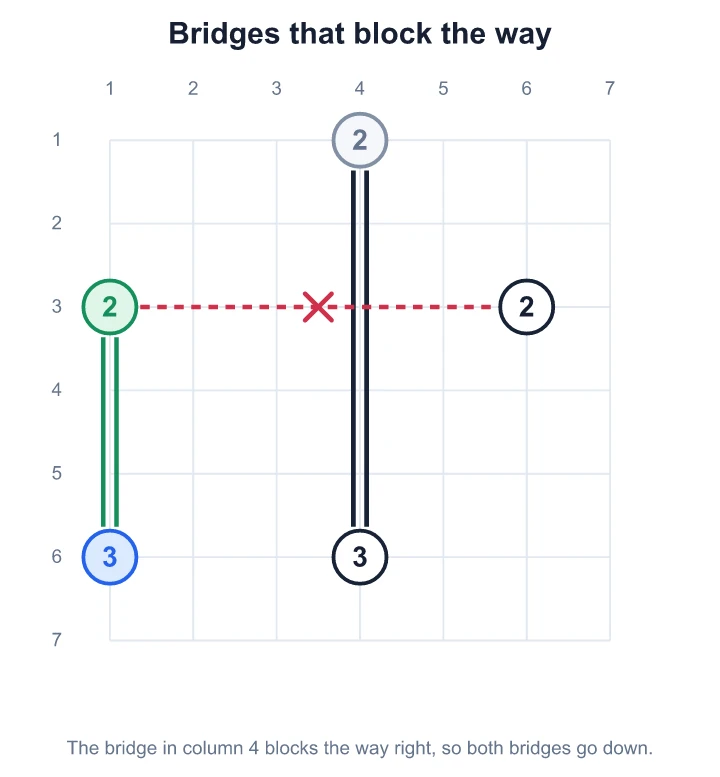
Using it. After each new bridge, check the islands it passes between. In the diagram the double bridge down column 4 stands between the 2 in row 3 and the 2 to its right. That leaves the 3 below as the 2's only neighbour, so it takes both bridges.
Keeping everything connected
Never close off a pair
Seeing it. Every island has to end up in one network. If a bridge completes both of the islands it joins and they have no other bridges, those two are cut off for good.
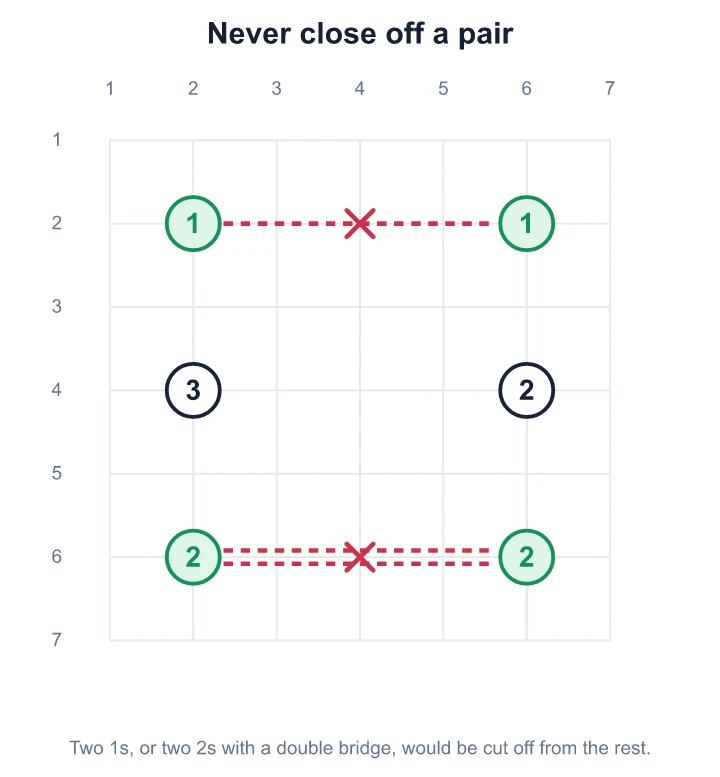
Using it. Two 1s can never be joined to each other. Two 2s can share one bridge but never two. In the diagram both red bridges would close off a pair. (The only exception is a puzzle with just those two islands in it, which you won't meet in a book.)
Keeping everything connected
Don't cut off a group
Seeing it. The same rule works for bigger groups. Look for a few islands already joined together that only need one or two more bridges between them.
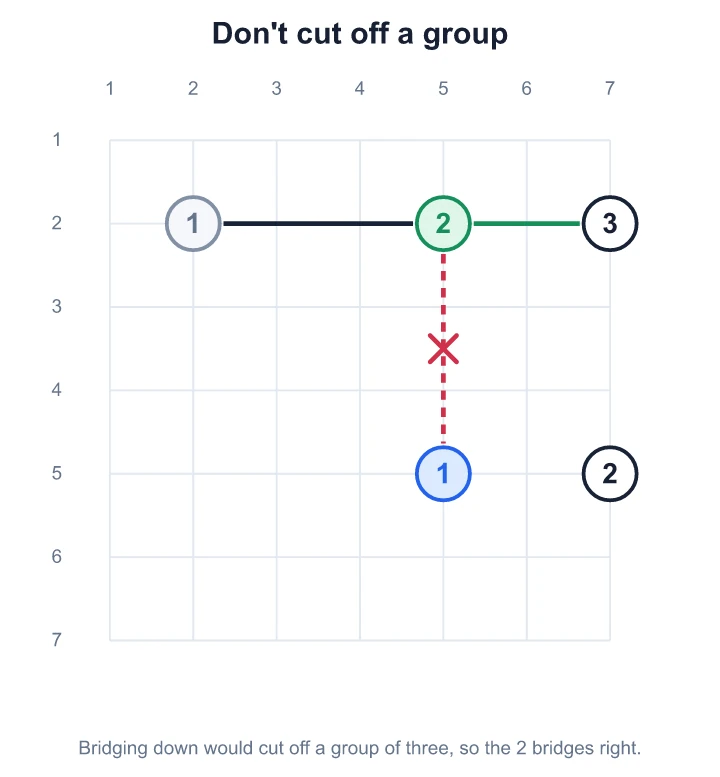
Using it. If a bridge would complete every island in a group, and none of them would have a bridge leading anywhere else, it's wrong. In the diagram the 1 and the 2 in row 2 are joined, and the 2 needs one more bridge. Down to the 1 would complete all three and cut them off, so the bridge goes right to the 3.
When you're stuck
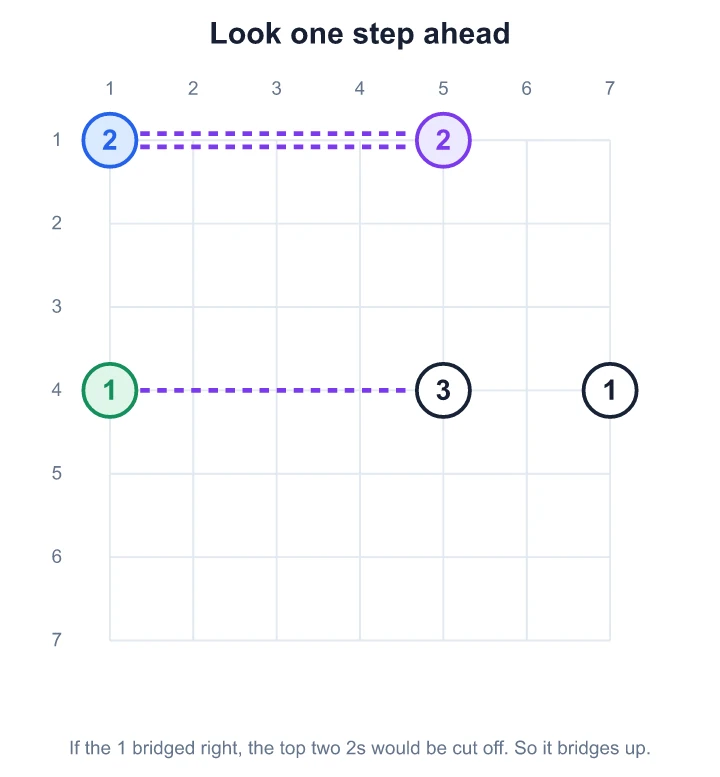
Look one step ahead
Seeing it. Find an island with only two ways to go, and think through what the first one would force.
Using it. If it forces a broken rule, such as a closed-off pair or an island with too few bridges, take the other way. In the diagram the 1 can bridge up to the corner 2 or right to the 3. If it went right, the corner 2 would have only one neighbour left, the 2 at the top, and would need both bridges from it. That closes off the pair. So the 1 bridges up. Test one step at a time: a well-made Hashi never needs a real guess.